
We are reader-supported. When you buy through links on our site, we may earn an affiliate commission.
Stainless steel looks sleek — until it doesn’t. Learn how to remove scratches from stainless steel like a pro, so one accidental swipe with steel wool or an unlucky scrape with a pan won’t suddenly leave your fridge or sink with a glaring imperfection.
The good news? You don’t need to replace anything. With the right method, you can learn how to fix scratches on stainless steel and restore that clean, high-end look.
This step-by-step guide covers how to assess, fix and protect stainless steel surfaces using safe, effective techniques for homeowners, renters, contractors and anyone trying to get appliances and surfaces looking new.
Before you grab a cleaner or cloth, get to know what kind of stainless steel you’re dealing with.
Brushed surfaces have a visible grain and matte finish, resulting from the internal microscopic crystalline structure, making it easier to disguise or buff out scratches. Mirror-polished stainless steel is more reflective and delicate, so scratches show up faster, and you’ll need to do more gentle repairs. Matte or satin finishes fall in the middle, offering slightly more resistance to marks but still needing care.
You’ll most often see scrapes on kitchen appliances, sinks, countertops and backsplashes, especially in high-use areas. The direction of the grain matters, as any repairs must respect that pattern to avoid scuffing over scrapes.
Knowing what you’re working with helps you choose the proper repair method — and avoid worsening the damage.
Surface damage falls into one of three categories:
To fix scratched stainless steel safely, start with gentle products and scale up if necessary.
A basic scratch repair kit might include a microfiber cloth, a non-abrasive cleaner and a polishing agent like mineral oil or stainless steel polish. Baking soda mixed with water makes a useful paste for fine scratches, while whitening, non-gel toothpaste can be another mild alternative. Adding a little vinegar to the baking soda solution is also a handy hard water limescale remover to brighten the metal.
Consider dedicated stainless steel scratch removal kits from trusted brands like Rejuvenate, 3M or Weiman if dealing with moderate damage. You may need fine-grit sandpaper with 600 to 1,500 grit for deeper fixes, but use it carefully — and always with the grain.
Avoid steel wool, harsh chemicals like bleach or ammonia and paper towels. For eco-friendly options, try vinegar, plant-based cleaners or olive oil.
Never repair a dirty surface. Residue or grit can cause new scratches while you’re working.
Wipe the area with a damp microfiber cloth and a non-abrasive cleaner or vinegar solution. Rinse thoroughly and dry completely, always working toward the grain.
Even invisible grime can interfere with scratch removal, so this step is worth taking slowly. Potential buyers are put off by finger-smudged appliances, so this is a daily requirement for show houses and a good maintenance go-to.
For light scratches, start with the gentlest method. Make a paste with one tablespoon of baking soda and a few drops of water. Apply it to the scratch site using a soft microfiber cloth, rubbing lightly in the same direction as the grain. Avoid circular motions.
After a minute or two, wipe away the paste, rinse the area and dry it. If the scratch is still visible, you can try again or switch to a stainless steel scratch remover for more impact.
Finish the process by buffing the area with a drop of mineral oil or polish. This step helps restore the shine and adds a protective layer against future marks.
If you’re dealing with a deeper scratch and feel confident moving forward, wet-sanding may be the next step.
Start with 600 or 800-grit sandpaper. Wet it slightly to reduce friction, then gently sand in the direction of the grain. Use consistent, light pressure. Stop frequently to clean the area and assess your progress.
Move up to finer sandpaper — 1,000 or 1,500 grit — to blend the scratch further and smooth the finish. Clean again, then finish with stainless steel polish or oil.
Don’t overdo it. Stop and call a professional if you notice discoloration, warping or irregular texture. Some jobs are better left to the pros, especially if you’re dealing with high-end appliances or resale concerns.
Ongoing care is the easiest way to keep your stainless steel appliances and counters looking their best, without costly touch-ups. Once your surface is restored, protect it from new damage with a few simple habits.
In real estate and renovation, first impressions count. Scratched stainless steel — even minor — can lower a home’s perceived value or make a rental unit look neglected.
Repairing scratched appliances or sinks rather than replacing them is often more cost-effective and environmentally friendly. For contractors, adding stainless steel restoration to their post-renovation punch list gives their projects a polished finish. Knowing how to quickly restore a grill, fridge door or stove panel can make a difference in presentation and saleability for real estate agents.
It’s a small detail that can leave a big impression.
These products will help you maintain and revive tired appliances, surfaces and counters, restoring a lustrous glow.
Flitz polish is ideal for brightening discolored metal surfaces, though it’s not likely to remove substantial scrapes or deeper scratches. It’s an ideal treatment to protect and maintain your steel features.

This industrial-strength polishing cream buffs scrapes and minor scratches from various steel surfaces, including stainless steel. The finish includes a protective coating, which ensures your appliances stay glistening for longer.

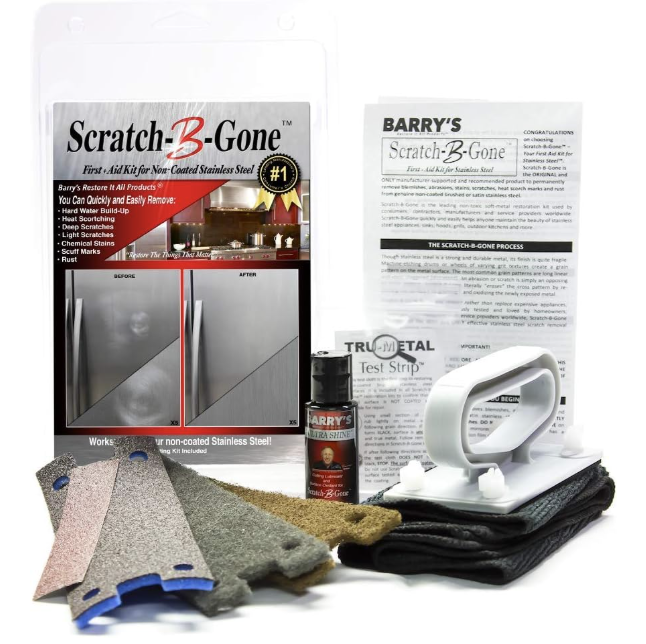
Barry’s Restore It All kit features everything you need to clean non-coated stainless surfaces, such as refrigerators, pots, appliances and backsplashes, for a comprehensive solution. The handy guide shows you how to clean like a pro with easy steps.
Not all social media tricks and tips are safe. These myths could damage your steel surfaces, so avoid them when cleaning.
1. Myth: Toothpaste works for all scratches
Reality: Only non-gel, mildly abrasive toothpaste helps with light scratches, and even then, results may vary. Avoid using bleaching or whitening toothpaste.
2. Myth: Magic Erasers are safe for stainless steel.
Reality: These are microabrasive and can dull the surface if overused.
3. Myth: Going in circles blends scratches better.
Reality: Always go with the grain. Circles make marks more visible.
Not all. Surface-level scratches often can be erased, but deep gouges may need professional refinishing.
It might depend on the method and your appliance’s manufacturer. Check the warranty before sanding or using third-party products.
Yes, both can work for light scratches. Use gently, and avoid any abrasive gels.
Definitely. Try baking soda, vinegar or plant-based cleaners for a greener approach — just spot-test first.
Skip harsh chemicals, such as steel wool, bleach and scouring pads. These can worsen scratches or cause discoloration.
Stainless steel may be sleek and stylish, but it needs the proper care to stay that way. Whether repairing a scratched sink or freshening up a fridge for a showing, you can safely fix most stainless steel scratches with tools you already have at home.
Follow these steps, keep the grain in mind and you’ll get lasting results and a gleaming finish that matches.