We are reader-supported. When you buy through links on our site, we may earn an affiliate commission.
Christmastime is filled with many traditions, from gift-giving to drinking hot cocoa by the fire. Decorating the tree is a big moment for many families and a fun way to bond. Whether you’re wondering how to decorate a Christmas tree with ribbon or simply looking for ideas and inspiration, you’re in the right place. Here’s how to decorate your Christmas tree, step by step, to make it sparkle and shine.
Quick answer:
You may be in a hurry to get to the fun bit, but successfully decorating a Christmas tree starts with getting organized.
To start, you need to know where you will put the tree. If you have lived in your home for a while, you probably have a traditional spot for it, but if it’s your first tree in this home, it pays to think about its location. Choose somewhere at least 3 feet from heat sources like fireplaces, radiators, candles, and heat vents, out of direct sunlight, near a socket and where the tree won’t constantly be brushed up against by people or pets moving past. Make sure the tree doesn’t block an exit. Of course, make sure it’s within view so that everyone can enjoy it. Move any necessary furniture to make space.

You might decide to cut one down with the family, buy a ready-cut tree or pick up an artificial one. Either way, you determine what fits best with your home’s style and your budget. Not sure which tree to pick? See our guide to Christmas tree species.
If you’re cutting down your tree, consider the following tips:
When looking for artificial trees, choose the one that is easiest to assemble and store. If you’re buying one, look for indoor-rated, UL-listed lights. Test them before you decorate and replace any dead bulbs.
You will also need to buy, find or gather:
With everything assembled, it’s time to get started.
| Tree height | Mini lights (about 100 per foot) | Ornaments (10 to 15 per foot) |
|---|---|---|
| 6 feet | About 600 | 60 to 90 |
| 7 feet | About 700 | 70 to 105 |
| 8 feet | About 800 | 80 to 120 |
| 9 feet | About 900 | 108 to 180 (12 to 20 per foot for 9-foot trees and taller) |
These are starting points from Wirecutter and Christmas Central. Use fewer lights if you choose bright LEDs or large vintage-style bulbs, and adjust the ornament count to your style.

A common order that gives a polished look is below. Some decorators add the topper earlier, so adjust to what works for you.
If you cut down the tree yourself, place it into the tree stand. Make sure it is sturdy before you start adding your decor. Put the cut end in water within two hours of buying the tree, and check the water daily from then on. For a live tree, choose the side where the branches are most even as your “front.” If you have an artificial tree, assemble the different parts. You will also want to fluff out the branches. When you first take it out of the box, it will probably still be a little flat.
Fluffing your tree gives it a fuller look and fills in any gaps. This helps on both artificial and live trees. It is, however, a bit of an art form.
Pro tip: Wear gloves when fluffing your Christmas tree, as it can get scratchy really fast.
Start from the bottom and work upwards. Fluff each section before you add the next one. In each layer, fluff the back branches first and work forward. Fan out each branch’s offshoots in different directions. Adjust the tips of each branch and offshoot to give a more natural look — some tips will point up, some down, some straight out. Periodically step backwards to get a full view and adjust branches slightly to fill in any gaps.
Fluffing an artificial Christmas tree is time-consuming, but it’s one of the most important elements in creating a wow end result, so try not to skip this step when decorating a Christmas tree step-by-step.
Unpack the lights and ensure they are tangle-free. Bonus points if you remembered to store them carefully from last year — wrapping them around a torn-off piece of cardboard is a quick and cheap storage solution to prevent tangles.
Test each strand before you hang it, and replace any dead bulbs. Inspect the cords too, and throw away any strand with frayed or pinched wires, as the U.S. Fire Administration advises. Follow the manufacturer’s instructions for how many strands you can connect.
Plug them in. It’s much easier to get lights evenly spaced when they are turned on. Most people then find the end of the lights furthest from the plug, and start from the top of the tree. The easiest way to add lights is to simply wind them around the tree horizontally. If you have plenty of lights, consider doing a zig shape on each layer, positioning some further back on each branch as well as near the front. This will give you a truly dazzling tree.
If the lights are more sparse, you can skip that and just place them near the ends of the branches for best visibility. You could also consider hanging Christmas tree lights vertically, suspended from a halo at the top – that can be a creative option if you don’t have many. Like tree fluffing, getting evenly spaced lights is an art form, so step back periodically to check what you are doing.
Your method affects the time and number of lights. Home Depot’s guide estimates about 20 minutes for a simple spiral from the top, which uses the fewest lights, and an hour or more for wrapping each branch, which uses the most. When you’re done, stand back and squint at the tree. Dark spots will stand out, and you can add lights there.
Ribbon adds a professional look to your tree, helps to establish the color scheme and fills in gaps. Ribbons can definitely make your tree stand out, but they’re not always the easiest thing to manage. If you’re wondering how to decorate a Christmas tree with ribbon, here are some tips.
Choose a wired ribbon if possible, as it holds its shape and allows you to create loops, bows or curls. A narrow ribbon is often lost on a tree, so a wider one is better. Popular ribbon techniques include:
Start at the top and work down and around the tree. Gently swagged garland looks more graceful than straight or diagonal lines. Christmas Central suggests roughly 9 feet of garland for every foot of height on a large tree for a full look, and fewer for a small tree.
Silver and gold are common garland styles, but here are some other types of garland to consider:
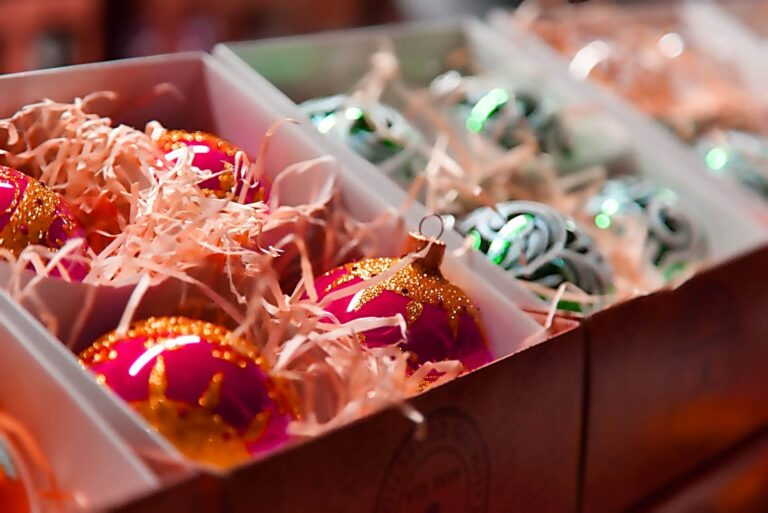
This is the perfect opportunity for your creativity to shine! There’s a wide variety of ornaments, from colored balls to handcrafted baubles. Consider starting with larger ones to fill any gaps. Hang them deeper in the branches for depth and stability, then add medium ornaments, and finish with small ornaments toward the branch tips. Use ornament hooks, and don’t forget the back of the tree.
You may also want to decide on a theme in advance. This can help you pick out which ornaments to use. You may even draw inspiration from elements already on the tree, such as your ribbons.
When examining different sections of your tree, consider whether you want the colors to match or contrast. Try placing larger baubles in the center to create more depth.
If you have pets or small children, hang shatterproof ornaments on the lower branches and keep special or fragile pieces higher up, above “wag height.”
To make your tree even more personalized, consider homemade baubles. This can also be a fun bonding experience with your family.
Here are some easy-to-make ornament ideas to get you started:
If you’re not too crafty, consider shopping at Etsy for unique ornaments. Also, think about adding any extra elements, like flowers, to make your tree shine.

The next step is to add a tree topper! Gold stars or angels are classic toppers, but you can certainly choose one that fits into your overall design. Choose a topper that suits the size of your tree and isn’t too heavy for the top branch. If it’s a lit topper, plug it into the end of your light strand. Step back to check that it’s straight.
Here are some classic designs to consider:
Also, placing a bow on top creates a classy style and complements your other decor. Here are the steps to creating your bow:
If you’d rather not reach over a finished tree, you can add the topper right after the lights.
A skirt or collar is the final thing you need to know about how to decorate a Christmas tree. A skirt lies flat on the ground and provides a lovely base on which to stand your gifts. A collar is more 3D and effectively hides the tree base. Which you choose is up to you, but either or both will give your tree a truly finished and professional look. Make sure it covers the entire tree stand, and that you can still reach the stand to check the water.

The best Christmas tree decorating ideas are the ones you simply fall in love with, but if you’re looking for inspiration, it’s always fun to know what’s trending each year. Here’s a sample of what people are loving this festive season:

When looking for Christmas tree decorating ideas, you don’t have to go with new and trendy. There are many timeless options that will never go out of style, so any decorations you buy will be good investments that you can use year after year. For example:
Christmas comes but once a year, so you’ll want to get this right! Here are some answers to other questions you may have.
Aim for at least 100 mini lights for every vertical foot of tree. So, a 7-foot tree needs 700 or more lights to look its best. You can use fewer if you choose bright LEDs or large vintage-style bulbs. See the table above for a quick guide by tree height.
Make sure your tree has a fresh cut at the base before you put it in the stand and keep the stand filled with water every day. NFPA recommends trimming about 2 inches off the base before placing the tree in the stand, and the Morton Arboretum says to put the freshly cut end in water within two hours of buying it. Never let the cut end dry out. Keep the tree at least 3 feet away from heat sources like vents and fireplaces, and out of direct sunlight. Take the tree down if the needles feel dry and the branches turn brittle. For more tips, see our guide to keeping a Christmas tree alive longer.
Special ornaments deserve a place of honor. To ensure they are visible and appreciated, place them at eye level in the most prominent areas of your tree. However, if you have kids or pets, you might want to place fragile, irreplaceable items higher up the tree (above “wag height”) and secure them with wire.
A common order is: fluff the branches, add lights, add ribbon and garland, hang large ornaments, fill in with medium and small ornaments, add the topper, and finish with a skirt or collar. Some decorators add the topper right after the lights so it’s easier to reach.
Christmas Central suggests 10 to 15 standard-size ornaments per foot for trees under 9 feet, and 12 to 20 per foot for taller trees. Mix large, medium, and small ornaments for depth.
Use wired ribbon, which holds its shape. Start at the top and either cascade it down, wrap it loosely around the tree, or make bows. Tuck it into the branches rather than pulling it tight.
Either works. Adding the topper right after the lights is easier to reach, and a lit topper can plug into the light strand. Adding it last gives you the finishing touch.
Decorating your tree can be a fun way to get into the holiday spirit. No matter your design style, follow these step-by-step instructions to decorate your Christmas tree like a pro. Turn up those Christmas tunes and get started!
Note: This article was first published on November 22, 2022, and was revised on November 19, 2026 to reflect the most current information.